AFTrack uses for offline maps two file types:
OSZ files - these are zip files with the tiles in the sub-directories and an information about the size and the included zoom levels. OSZ files should contain around 5000 tiles, otherwise the opening takes too long or it may not be opened at all. Simultaneously using multiple maps can be difficult. But the access is very fast, once it's open.
Sqlite databases - the formats mbtiles (Mobac: MBTiles SQLite) or sqlitedb (Mobac: Big Planet Tracks SQLite, OSMAND SQLite or RMaps SQLite) can be used .
Note: for the Symbian version of AFTrack only OSZ is available.
For the generation the programs MobileAtlasCreator (download) and Maperitive (download) are used.
It makes sense to install both programs in a folder to keep track.
E.g.
d:/Maps/Mobac
d:/Maps/Maperitive
Mobac gets the required tiles from a data store (online or offline) and binds them together in the destination format.
Easiest way
- Define an output format: AFTrack OSZ (Menu: Atlas)
- Select online maps source
- Determine zoom level
- Select an area with the mouse
- Give the selection a name
- Press 'Create'
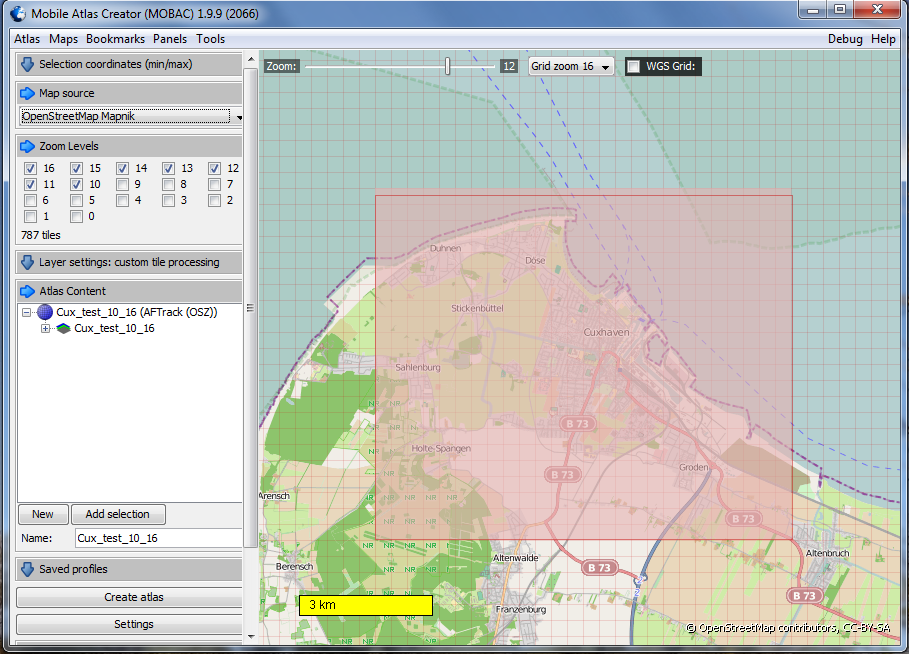
The completed file is found in the directory Mobac atlases named Cux_test_10_16.osz.
Also, several selections are processed together.
The servers or the users of it are not very happy when large quantities to be picked up at once. Some OpenStreetMap servers block these programs - see the OSM wiki.
To create bitmap graphics from OSM raw data you can use the program Maperitive. Also here is a simple example:
- Select a map
- Set the 'Geometriy Bounds'
- Get the raw data 'Download OSM Data (Overpass)'
- Ignore the Web Map
- And generate the tiles with menu 'Tools / Generate Tiles'
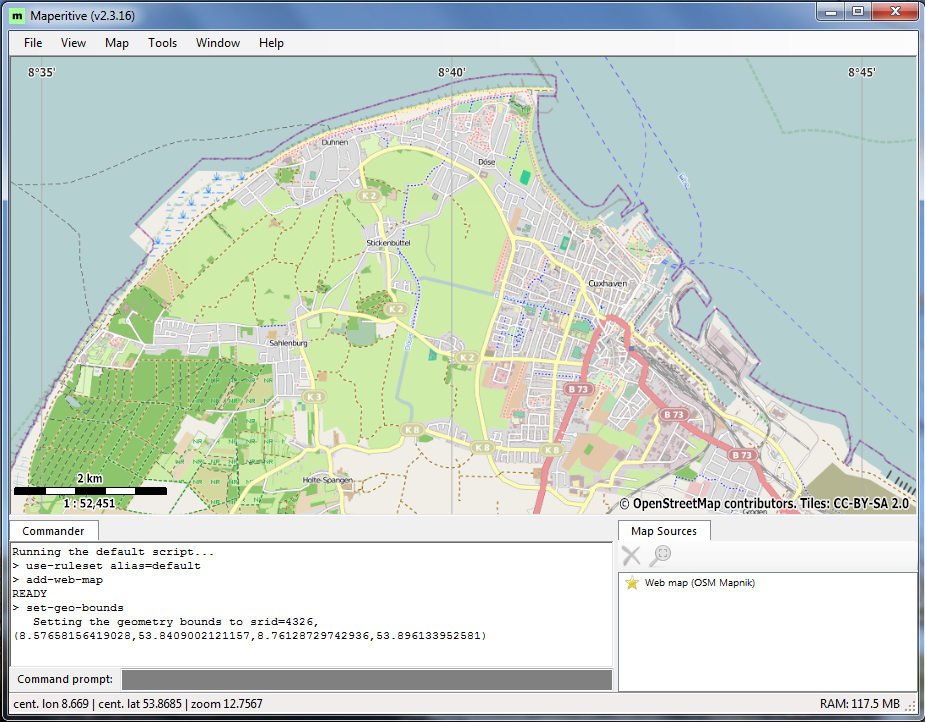
After completion, the tiles are in the directory Maperitive/tiles .
However, it is better to generate the tiles from the command line, then you can determine the color itself:
generate-tiles minzoom=10 maxzoom=16 color-depth=8
On the command line you can generated also a mbtiles database .
At the command prompt enter:
generate-mbtiles minzoom=10 maxzoom=16 color-depth=8
And you get a file map.mbtiles
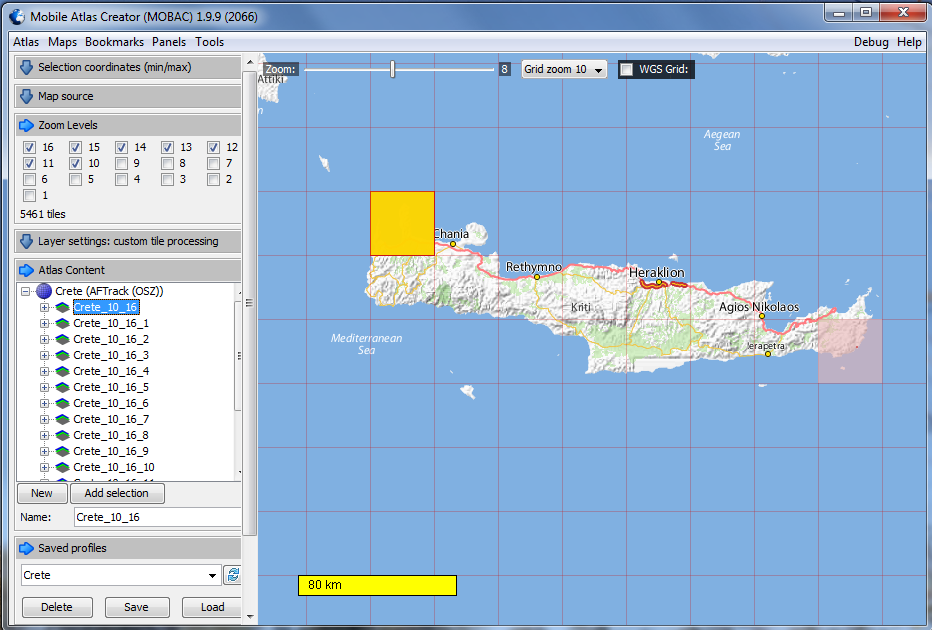
A more complex example for the play together of both programs.
It should be generated a tile container for Crete Island in the zoom levels 10 to 16.
Preparation in Mobac:
- With a standard Web Map select. A tile in zoom level 10 corresponds to about 5000 tiles in the zoom levels 10 to 16
- Save the profile for a later use (download)
Now get the data.with Maperitive
- Mark the section
- Download OSM raw data
- Ignore the Web Map
- Edit the command line to generate the tiles
generate-tiles minzoom=10 maxzoom=16 color-depth=8

Now the connection of both programs:
Mobac has to know the new map source.
This requires a XML file that can be inserted (download) and copied to the Mobac mapsources folder.
------------
<?xml version="1.0" encoding="UTF-8" standalone="yes"?>
<localTileFiles>
<name>Maperitive Tiles</name>
<sourceFolder>D:\maps\Maperitive\Tiles</sourceFolder>
<backgroundColor>#00000000</backgroundColor>
</localTileFiles>
----------
After a restart of Mobac this new source is available.
Now you simply have to select the new data source and the atlas are created.
The OSZ format is created with 17 regional maps.
For MBTiles with SQLite it is only one file with all of the tiles.
So far, to generate tiles the raw data were downloaded directly from the Internet.
To prevent this you can download the raw data for all areas to the local machine.
Server for this are GeoFabrik and CloudMade
For the Crete example we need the file greece.osm.pbf downloaded from the Geofabrik or greece.osm.bz2 from CloudMade.
The additional generation is now controlled by a script (Download).
-------------------------------------------
use-ruleset location="D:\Maps\Maperitive\Rules\Default.mrules"
apply-ruleset
change-dir D:\Maps\Maperitive
load-source "D:\MapsMaperitive\Karten\greece.osm.pbf"
set-geo-bounds 23.5,34.7,26.4,35.8
generate-contours interval=25
generate-tiles minzoom=10 maxzoom=16 color-depth=8
-------------------------------------------
Or as mbtiles format
generate-mbtiles minzoom=10 maxzoom=16 color-depth=8
The commands can be typed in the command line of Maperitive.
Start the script from the menu or start it with the program:
d:\Maps\Maperitive>maperitive scripts/crete.mscript
And generate over again the tiles container with Mobac - see above.
Start Maperitive and select an area. Then choose the tools/generate hillshading menu.
Add this rule set on the command line prompt: use-ruleset rules\trans.mrules
And apply it with apply-ruleset
Deselect the web map. It was only for finding the right area.
The background should be black now.
Now the map can be generated by typing generate-mbtiles minzoom=10 maxzoom=16
And you have a map.mbtiles in your tile folder.
For the next commands on your map file sqlite is needed. Download
On a system command prompt enter this sqlite command to define the map as overlay
sqlite3 maps\map.mbtiles "update metadata set value='overlay' where name='type';"
control it with
sqlite3 maps\map.mbtiles "select * from metadata;"
If you like give it a nice name
sqlite3 maps\map.mbtiles "update metadata set value='My Hill Area' where name='name';"
Use the same area for this sample.
And load now the OSM data from the map menu.
And again do the sqlite command for making this map an overlay.